Bow Drawing Step by Step
There have been a wide range of weapons utilized over the entire course of time. Some are in a split second unmistakable, and despite the fact that they haven’t been utilized for hundreds or even millennia they stay famous right up ’til now. A portion of these incorporate swords, safeguards and obviously the bow and bolt.
Visit the Children coloring pages for kids’ education.
On the off chance that you’re one of the many individuals who favor the bow, maybe you’ve attempted to draw one eventually and saw that as it’s not quite so natural as it looks! We made this aide on the most proficient method to attract a bow 7 simple tasks to make them attract this cool weapon no time!
Stage 1 – bow drawing
For this initial phase in our aide on the most proficient method to draw a bow, we will begin with the edge of the bow. The state of the casing can be somewhat interesting to draw, as it includes a great deal of bended lines very near one another. This is most certainly a stage that you ought to go ahead and take gradually and cautiously! Make certain to make an honest effort to have the two parts of the bow at an equivalent length.
Stage 2 – Next, draw some score subtleties for your bow
With the edge of your bow drawing done, we can begin to add a subtleties to it. Close to the finishes of the edges, you can attract a few subtleties for the nocks. The nock of the bow is where the string is connected to the edge, and the reference picture will show you the shape it ought to take. Then, at that point, when the scores are drawn you can utilize two straightforward lines at the focal point of the bow edge to have the depression that the bolt will sit in.
Visit the latest News update on our Pakistan time news.
Stage 3 – Presently, draw the string for the bow
You would have a really futile bow without a string, so we should add one in this step of our aide on the most proficient method to draw a bow. The string will come from the nocks that you attracted the past step and will frame a three-sided shape moving in reverse, as we will attract a bolt later. For this step, utilizing a ruler to define the two boundaries of the string would be exceptionally useful!
Stage 4 – Begin to draw the bolt
Similarly that a bow is pointless without a string, it likewise doesn’t fill a very remarkable need without a bolt to shoot, so we will attract one now for your bow drawing. To begin the bolt, essentially utilize a thick line coming from the focal point of the bow until it contacts the mark of the string. Then, utilize a few straight lines to frame the little plumes close to the rear of the bolt. For a pleasant reality, those little quills are known as the fletching!
Stage 5 – Presently, draw a few subtleties for the bolt
In this step of this aide on the most proficient method to draw a bow, we will add a components to the bolt. Right off the bat, the bolt needs a highlight be compelling, so you can attract a three-sided shape toward the finish of it that has an upset base.
That might sound muddled, however the reference picture will assist you with getting the shape right. At last, define a few boundaries on the fluffy fletching to give it a more finished look.
Visit for free hd photos kids.
Stage 6 – Next, attract the last subtleties of your bow
This is seeming to be a magnificent bow drawing as of now! We will continue on toward the shading of the bow in the following stage, yet before we do, we should add a few last subtleties. We will add a few flimsy lines to the casing of the bow as well as the tip of the bolt. These will assist with adding a surface to it and give it a more powerful look.
These are the subtleties that we added to our drawing, yet you could likewise add your very own portion subtleties to customize your bow drawing. You could likewise draw a tomfoolery foundation for your drawing! For instance, you could draw an objectives toward the finish of a reach to give your attracting a subject to it. How might you polish off your bow attracting prior to continuing on toward the last step?
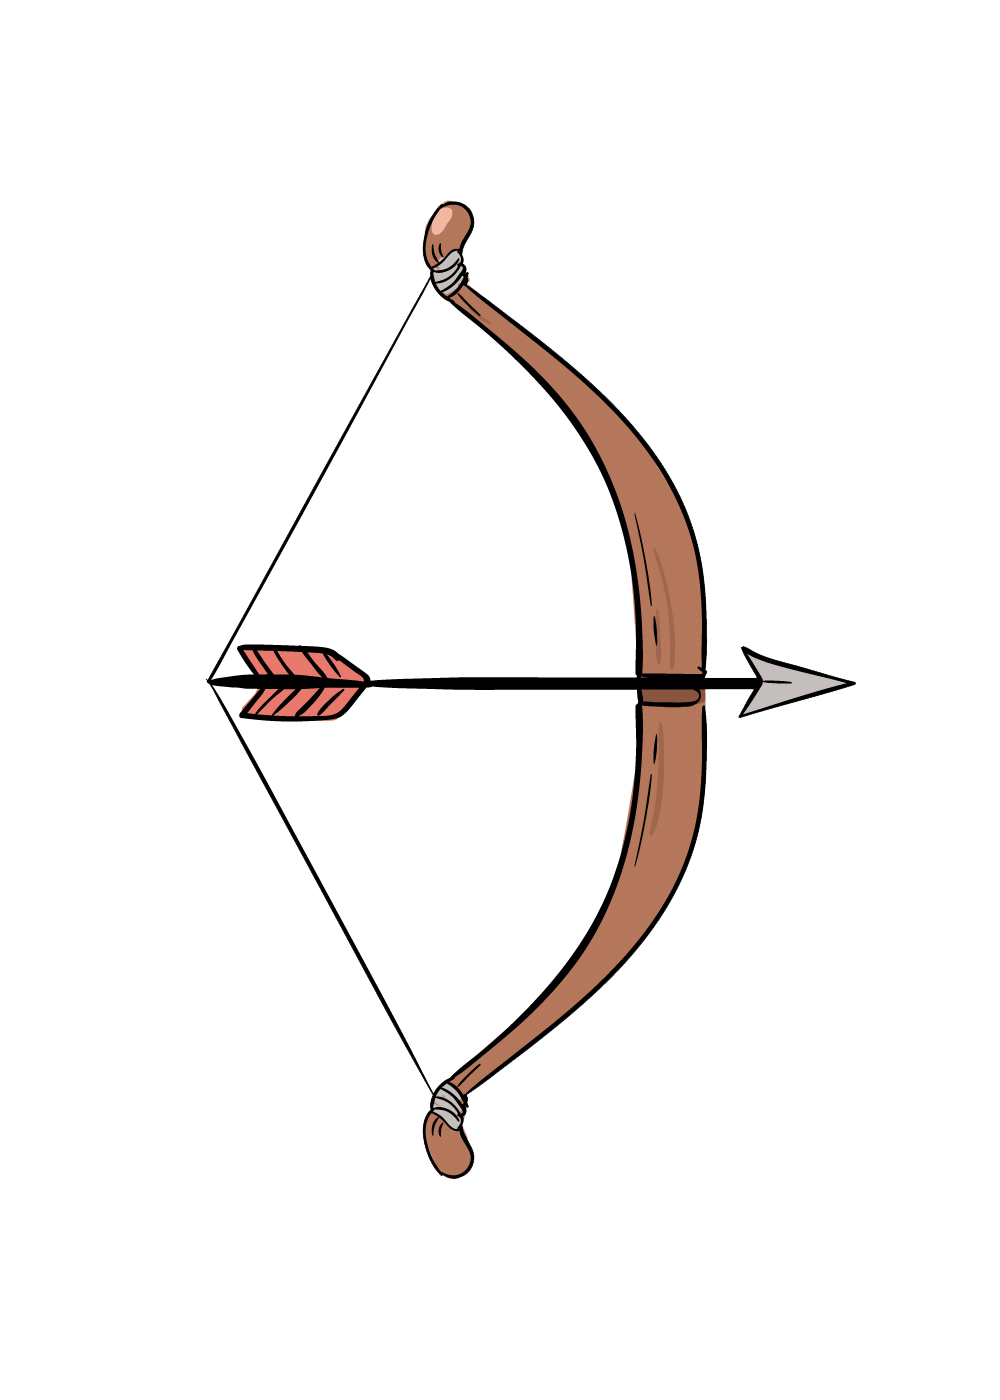
Stage 7 – Polish off your bow with some tone
Now that your drawing is done, you have arrived at the last step of this aide on the most proficient method to draw a bow! Presently comes the tomfoolery part, as you can live it up picking a few tones for your drawing. We picked an earthy colored variety conspire for our picture, as it assists with giving the bow a pleasant wooden focus on it.
However, you could utilize any tones you love for this drawing! Bows come in a wide range of varieties, and present day bows will frequently have splendid tones and in any event, marking on them. For a more multifaceted picture like this, you could utilize shaded pens and pencils to truly get in there for certain extraordinary subtleties and make the varieties pop! Do you figure you will utilize these to variety in your bow drawing, or will you utilize one more workmanship medium to rejuvenate your picture?